I’ve Moved!!
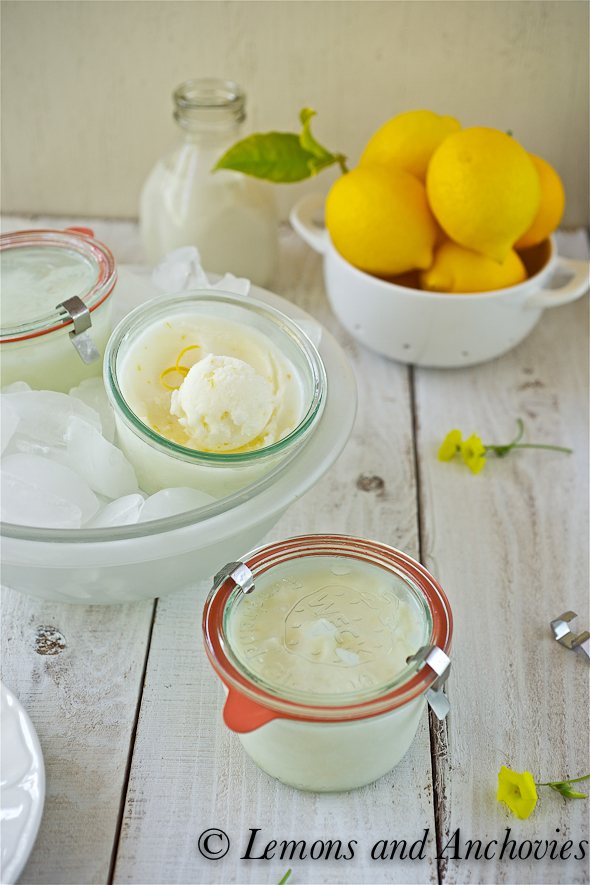
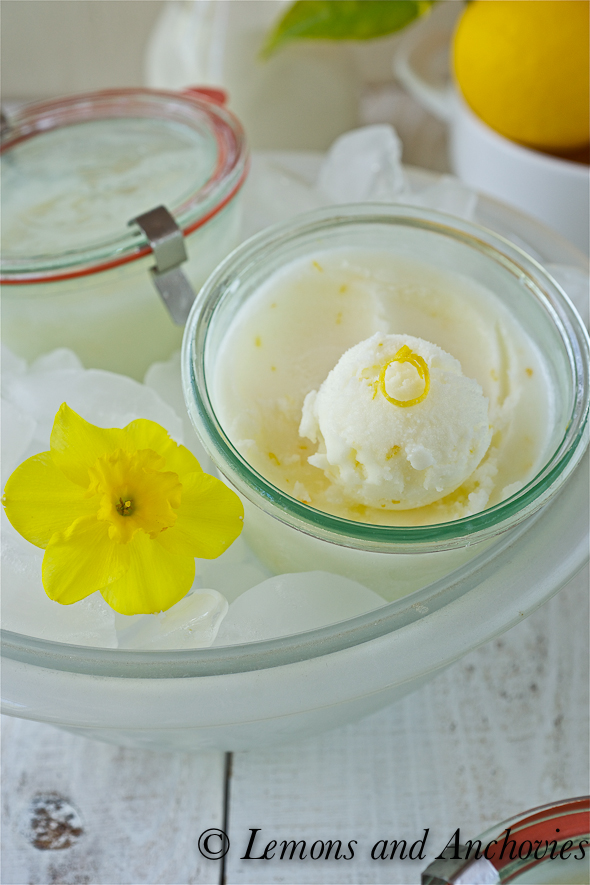
Lemon Buttermilk Sorbet
There is one part of me that feels a sorbet post is a bit premature–spring has not officially arrived yet, after all. Early morning and evening breezes still have a crispness to them, not quite eliminating the need to carry a scarf everywhere I go. My car is littered with them for daytime temperatures have me shedding them by midday. Some days it feels like spring has arrived.
In my kitchen at least, spring has sprung. My Meyer lemon tree is bedecked with fruits but I have to compete against the deer to to enjoy them. My tree is not tall–it dwells in a sunny spot against the back of my house and the low eave limits its height, also limiting its yield. There is a walkway lining that part of my home and it’s prime stomping grounds for the resident deer. It is not uncommon for me to be roused from sleep by rustling leaves outside only to see a mature buck with its huge antlers staring at me. It parades across my bedroom window as if this were the most normal thing in the world. In these parts, I suppose it is. So I grudgingly share my lemons with the deer.
Inspiration to make this simple sorbet arose out of a need to prepare something easy and with ingredients I already had available. I had leftover buttermilk, the Meyer lemons and a great desire to experiment with buttermilk sorbet.
I had no idea the two would pair so well together in a frozen treat. Buttermilk has a very distinctive flavor, one my husband is not particularly fond but he loved this sorbet. The recipe does not require a lot of lemon juice but the lemon zest stirred into the sorbet brightens this frozen treat in a big way. I also noticed that after 24 hours in the freezer, the buttermilk flavor mellowed some, allowing the lemon zest to truly shine. The former helped produce a creamy and smooth sorbet and my addition of Cointreau kept it from getting rock hard in the freezer. Not only was this scoopable, it was delightfully refreshing. I can see using this recipe as a base for other flavors in place of the lemon next time. Definitely a keeper.
* I spotted these Weck jars online a few months ago, fell in love with them and promptly ordered 12 in different sizes. Since they are freezer-safe I couldn’t resist using them for the sorbet. I’m still not brave enough to try canning (their original purpose) but I have used them for so many other things already. Canning…one day!
** This is the last post you will see here until I move to http://lemonsandanchovies.com. I have been talking about it for almost as long as I’ve had this blog. No big changes, just a different address. I hope you will follow me there when I move in. 🙂
Lemon Buttermilk Sorbet
* Recipe from Bon Appetit 2001 via Epicurious here
** The link above is for the original recipe. Based on recommendations I reduced the sugar by 1/2 cup but I had to adjust the amounts for the 3 cups of buttermilk I had available. I also used proportionately less lemon zest and added Cointreau (vodka would work, too). This amount fit in my ice cream maker perfectly.
*** I also took different steps to prepare this but this worked very well for me.
- 1 1/8 cup sugar
- 3/8 cup lemon juice (about 3 oz)
- 1 teaspoon packed lemon zest (I recommend using a microplane grater to avoid the pith)
- 3 cups buttermilk
- 1 1/2 tablespoons Cointreau
- Stir together the lemon juice and sugar in a bowl. I warmed mine in the microwave for about a minute to help dissolve the sugar.
- Add the buttermilk and stir until combined.
- Chill the mixture for a few hours (4 hours works)
- After the mixture has chilled, stir in the Cointreau before churning in your ice cream maker.
- Process in your ice cream maker according to manufacturer’s instructions.
- Stir in the lemon zest before serving. I like my sorbet to be a bit firmer so I transferred in jars and froze for a few hours before serving. Makes a little over 3 cups.
Pasta alla Carbonara
The summer before my freshman year in high school, my family moved out of San Francisco and to a neighboring town a few miles away. This meant that I spent my first year in a new school trying to find my place in a sea of new faces. I was extremely shy which severely limited my opportunities to make friends. I was too timid to join a club or participate in sports so the friends I made were those who sat around me in class. At least by the end of that first year I knew a small cluster of people I could consider friends and I didn’t feel so much like the new girl.
During my sophomore year, things continued to improve. I had become acquainted with most of the people in my class and also some upperclassmen but it was a passing comment from a friend that prompted an important revelation that I have never quite forgotten.
One day, as we were walking to class, this new friend said, “You’re actually really nice! We were afraid to talk to you for a while because we thought you were a snob!”
Me? A snob? I couldn’t believe it, but I suppose it was a valid observation to make about me at the time. I was so petrified of other people that I hid behind a mask of indifference. I never said hello first when walking down the hallway for fear that I would be ignored and humiliated. I never dared show that, yes, I wanted to smile and greet you but only if I knew that the gesture would be reciprocated. Oh, to be young and insecure.
I took that lesson to heart. I would like to think that I have made myself much more approachable since then, even deliberately putting myself in situations (through the rest of high school, college and later in my career) that forced me to be in front of the public and to make the first social/professional move. It has been liberating. I am still shy by nature but I have come a long way…and I am definitely no snob…
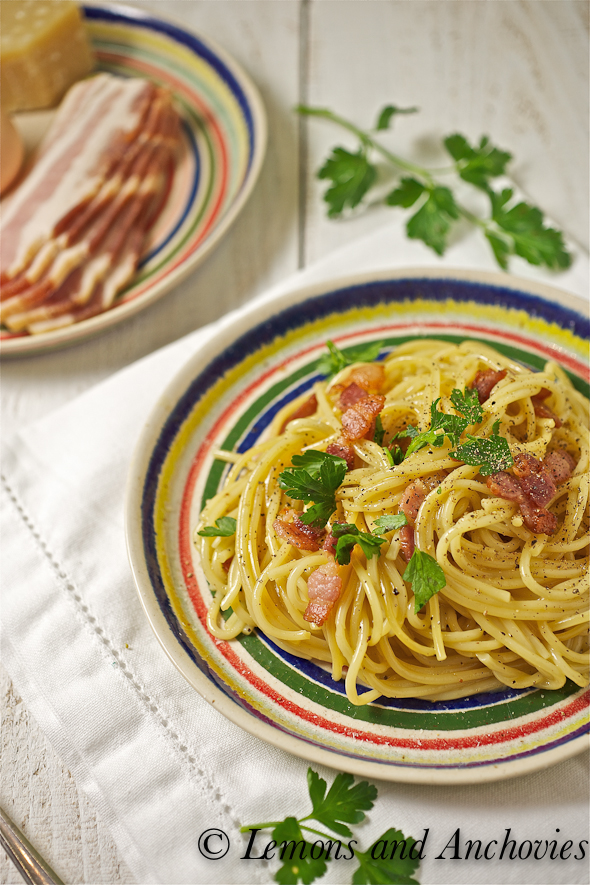
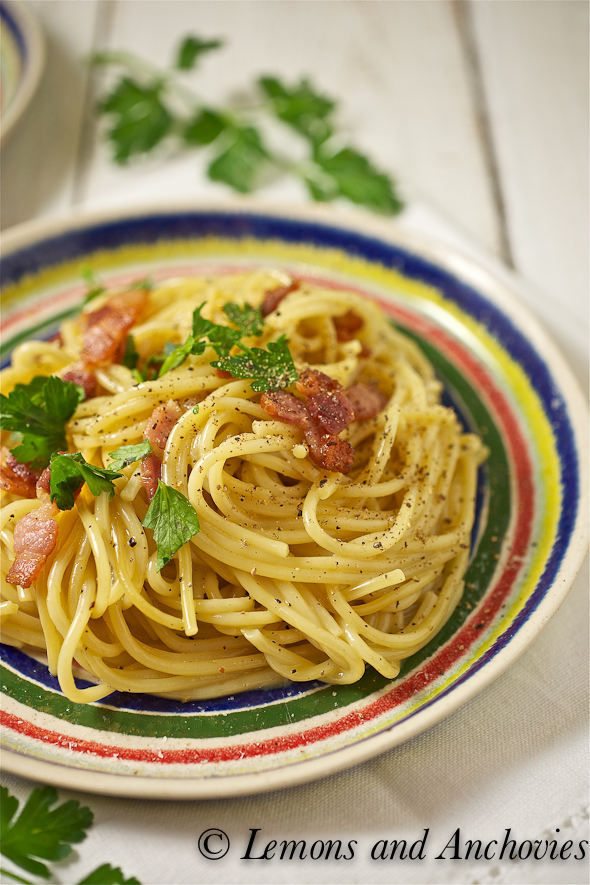
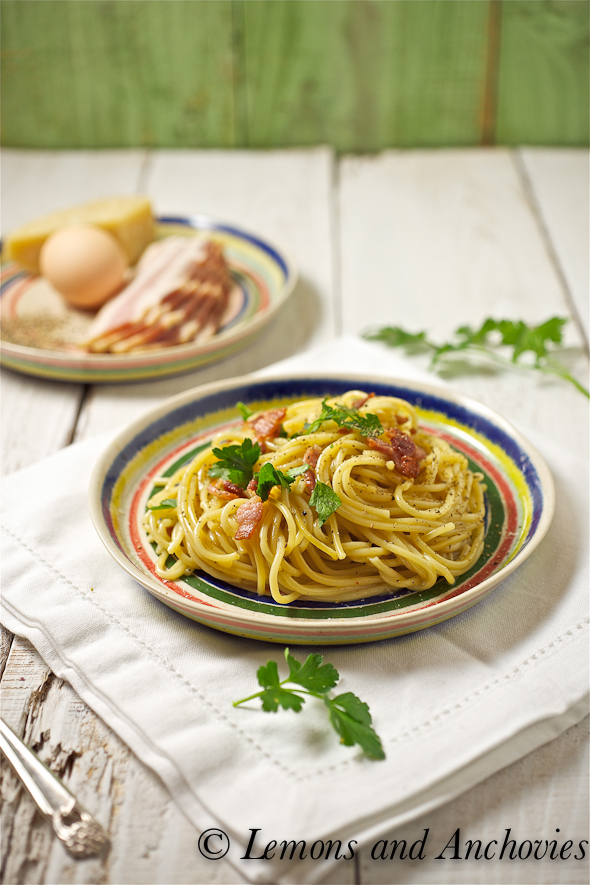
…well, maybe in one part of my life I do sometimes stick my nose up in the air. When it comes to pasta carbonara, I am quite picky. I am a stickler for its traditional preparation of using no cream. Pasta carbonara is a humble dish. If you love it as much as I do, you are familiar with its simple ingredients: eggs, guanciale, Pecorino cheese and ground pepper. I continue to have trouble finding guanciale so I usually use deli bacon (not heavily smoked) or pancetta on occasion. Pecorino-Romano is the preferred cheese in Rome where this dish originated, but Parmigiano-Reggiano is also widely used. Honestly, I don’t use Pecorino too much as it is a bit too salty for me. As for the eggs, the number of eggs used varies from recipe to recipe. Do you use only egg yolks or the whites too? There may be minor variations in proportion for these aformentioned ingredients but cream should never be part of the equation. Just my (not so humble) opinion. I have nothing against creamy pasta dishes–love them–just not in my carbonara, please.
Here is the way I have learned to prepare mine over the years. It took a bit of trial and error to not end up with scrambled eggs when “cooking” the sauce but I finally got it right. I hope you like it.
Pasta alla Carbonara
* serves 2 (easily doubles for 4)
- 1/2 pound spaghetti
- 4 ounces bacon, pancetta or guanciale (cut up)
- 1/2 cup Parmigiano-Reggiano, plus more for topping (or Pecorino Romano if you have it)
- 2 whole eggs
- 1 egg yolk
- Lots of freshly ground black pepper
- salt, to taste
- Chopped parsley for garnish (not traditional but I used for the photos)
- Reserved pasta water, optional
- Bring a pot of water to a boil but don’t start cooking your pasta until you have prepped the “sauce”. It is important that the pasta be freshly drained from the pot when you use it. It is this heat that will cook the eggs for the sauce.
- To prepare the sauce: In a bowl large enough to accommodate the pasta, whisk together the eggs, egg yolk, cheese and several turns of ground pepper from a peppermill. Set aside.
- When you are ready to fry the bacon, you can also start boiling the pasta. Cook the bacon in a pan until crisp. Take the pan off the heat and leave the bacon to cool slightly with its rendered fat for 3-4 minutes (about the same time it will take for the pasta to finish cooking).
- When the pasta is ready, drain it lightly so that you have just a bit of pasta water still dripping from the colander (don’t rinse!) and immediately add to the egg/cheese/pepper mixture. Add the bacon and drippings (if you have too much rendered fat, leave some out) and toss quickly to incorporate the sauce into the pasta. If the timing is right, you shouldn’t have any scrambled egg bits but it’s okay if you do. It will be better next time. 🙂
- Taste for seasonings. You shouldn’t need salt at this point but add if you wish. I always add more pepper to mine. Serve immediately.
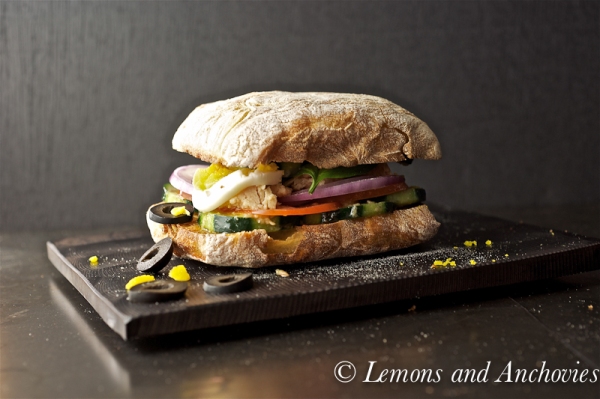
Pan Bagnat
This sandwich almost didn’t happen. You see, it almost cost me the tip of my finger. Well, the jury is still out on the last part but at least my doctor said this morning that I wouldn’t need stitches. This is what I get for underestimating a mandoline.
I wanted perfectly thin, uniformly-sliced vegetables for my pan bagnat and all was going well until I got to the cucumbers. The vegetable holder that came with the mandoline wouldn’t hold the cucumber so I decided not to use it. BIG. MISTAKE. In trying to get one more thin slice out of my cucumber my hand slipped. Then the blood–and tears–started flowing.
“D” is for Dummy. I’m glad you can’t see it emblazoned on my forehead right now. At least this sandwich was worth the pain.
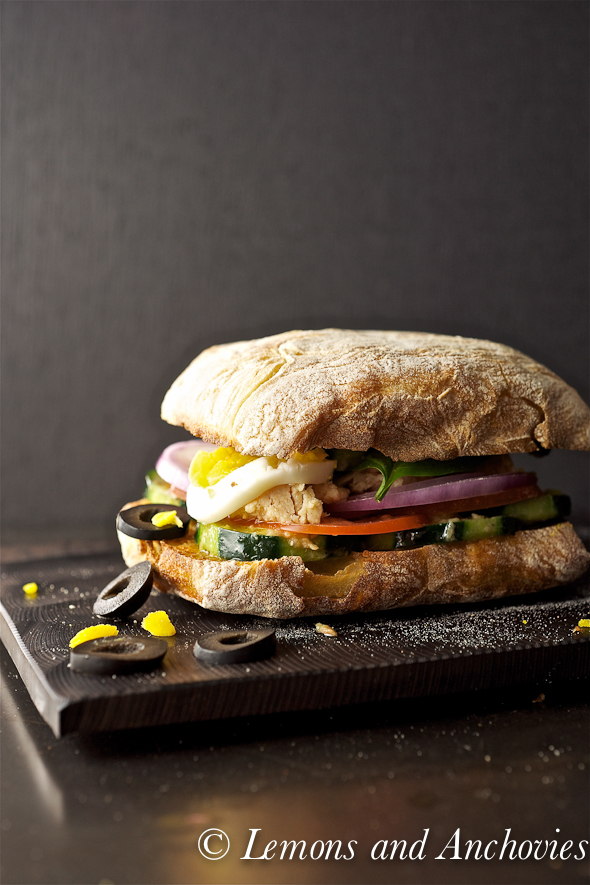
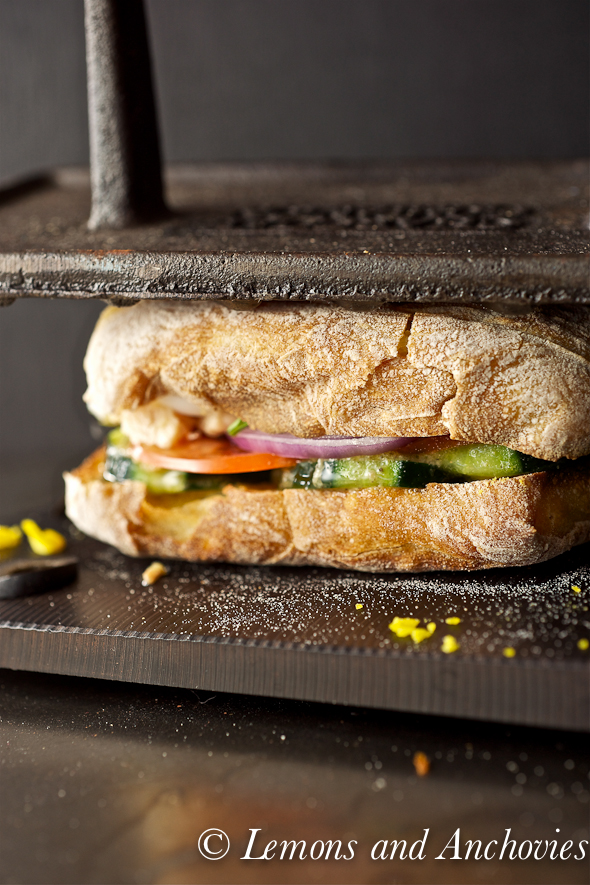
A pan bagnat is a Nicoise salad in sandwich form. Tuna, olives, a hard-boiled egg, onions and other vegetabes are bathed in an anchovy vinaigrette (pan bagnat means “wet bread”). It is a great make-ahead type of sandwich–sealing it in plastic wrap for at least two hours allows the flavors to meld–but it is also wonderful enjoyed immediately. This version from the New York Times has the added distinction of being pressed thin (I used my cast iron meat press) so that the vinaigrette disperses all over the sandwich. The crusty ciabatta (I toasted mine first) was perfect to hold the vinaigrette-drenched tuna, olives and vegetables–making for a flavorful, satisfying sandwich, sliced finger notwithstanding.
Now excuse me while I go out to pick up a mandoline glove.
Pan Bagnat
* From the New York Times (original recipe here, I adjusted the proportions on the vinaigrette)
- 3 anchovy fillets, minced (optional)
- 1 large garlic clove, minced
- 1 tablespoon red wine vinegar
- 1/2 teaspoon Dijon mustard
- Pinch of salt and freshly ground pepper
- 2-3 tablespoons extra virgin olive oil
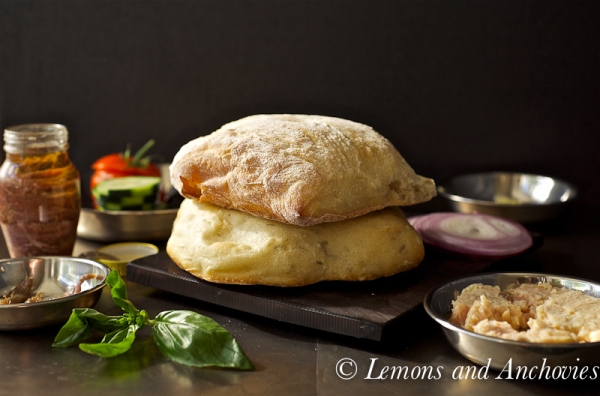
- 2 ciabattas, halved (I toasted mine lightly)
- 1/2 regular cucumber
- 1 medium-size, ripe tomato, sliced
- 1/2 small red onion, sliced
- 1 jar (5 to 6 ounces) tuna packed in olive oil, drained
- 8 large basil leaves
- 2 tablespoons sliced pitted olives, preferably a mix of black and green
- 1 hard-cooked egg, peeled and thinly sliced.
1. Whisk together the anchovies (if using), the garlic, vinegar, mustard, salt and pepper. Slowly drizzle in oil, whisking constantly.
2. Slice cucumber thinly then add to vinaigrette and toss well.
3. Spread half the cucumbers on bottom of bread. Top with tomato and onion slices, then with tuna, basil, olives and egg slices. Top egg with remaining cucumbers and vinaigrette. Cover with second bread half and firmly press sandwich together.
4. Wrap sandwich tightly in foil, waxed paper or plastic wrap, then place in a plastic bag. Put sandwich under a weight such as a cast-iron frying pan topped with a filled kettle. Weight sandwich for 7 to 10 minutes, then flip and weight it for another 7 to 10 minutes. Unwrap and serve immediately, or keep it wrapped for up to 8 hours before serving
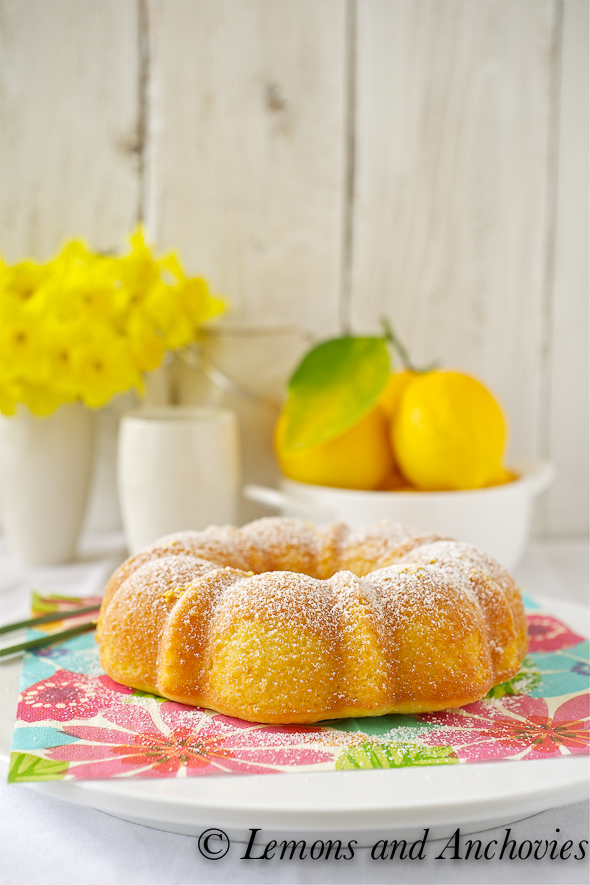
Lemon Cornmeal Cake
I was a few days into my South America trip when I decided to check my work email and found this message: “Jean, we saved a piece of lemon cake for you in the freezer. You’ll really like it.” Knowing my penchant for all things lemony, my office friends thoughtfully set aside a slice of the cake that one of our vendors’ wives made for our staff. Of course, on my first day back to work last week, I made a bee-line for the kitchen for an early morning sweet treat. Since I rarely eat breakfast and often arrive at the office hungry, the wait for my generous slice to come to room temperature on the counter seemed interminable but one bite was all it took for me to deem it worthy of anticipation indeed.
The cake was big on lemon flavor and not too sweet. I was pleased the find t0 recipe attached to the email with the baker’s note that she always adds more lemon juice and lemon zest than called for. But what caught my attention was its texture. Cornmeal lent a cornbread-like character to this otherwise light-tasting, refreshing cake and I quite liked it. I couldn’t wait to bake it myself.
I was not given the exact lemon juice and lemon zest amounts that our vendor’s wife uses in her version but I was happy with the amounts I used. This cake is ultra-lemony so feel free to use the original recipe below without my adjustments. However, it would be hard to go wrong either way. I can’t think of a better way to take advantage of citrus season (or this spring-like weather we’re having) than with this cake.
* I have not yet organized my pictures from South America so my recap will be delayed by a post or two but I will share soon…promise!
Lemon Cornmeal Cake
* Original recipe from Woman’s Day (found here)
** See step one below for using a regular-bundt pan. I used smaller moulds (image below) and a small bundt pan for this recipe and didn’t realize until later that my mini moulds have a decidedly holiday feel.
- Baking spray (cooking spray with flour) [I used regular cooking spray and dusted the pans with flour]
- 2 1/2 cups all-purpose flour
- 1/2 cup yellow cornmeal
- 2 teaspoons baking powder
- 1/2 teaspoon each baking soda and salt
- 2 sticks (1 cup) unsalted butter, softened
- 1 3/4 cups sugar
- 1 tablespoon grated lemon zest [I used zest of two regular lemons and one meyer lemon]
- 1/4 cup lemon juice [I used just under 1/2 cup, about 100 ml, using a combo of regular and meyer lemons]
- 4 large eggs
- 1 cup buttermilk or plain yogurt, stirred to loosen
- 1/2 teaspoon lemon extract [my addition, optional]
- Additional powdered sugar for dusting, optional
- 1 cup sugar [I used 1 cup powdered sugar and scant 1/4 cup granulated sugar]
- 1/3 cup lemon juice
- Heat oven to 325°F. You’ll need a 10-cup decorative tube pan or a 12-cup Bundt pan coated with baking spray [my cake looks smaller because I used mini moulds and a smaller bundt pan]. Whisk together the flour, cornmeal, baking powder, baking soda and salt in a medium bowl.
- In a separate bowl beat the butter, sugar, lemon zest and lemon juice with a hand mixer set at medium speed until the batter is light and fluffy. Beat in the eggs one at a time. Turn the mixer down to low and alternately beat in the flour mixture and buttermilk until the batter is smooth. Add the lemon extract and stir into the batter if using. Scrape into prepared pan; level top with spatula.
- Bake 55 to 65 minutes until a wooden pick inserted in cake comes out clean [for smaller cakes, cooking time is 25 minutes for the smaller moulds and 30 minutes for the smaller bundt pan]. Cool cake in pan on wire rack 5 minutes.
- Meanwhile, make the sugar glaze: Whisk glaze ingredients in a small bowl just until combined (sugar will not be totally dissolved). Invert cake from pan onto rack; place rack over a baking sheet. Brush glaze all over hot cake until absorbed (sugar crystals will be evident). Cool completely. Transfer cake to a serving plate and cover. Let cake rest several hours, or overnight, before serving. Store cake covered at room temperature up to 4 days. Cut into thin slices to serve.
Intermission
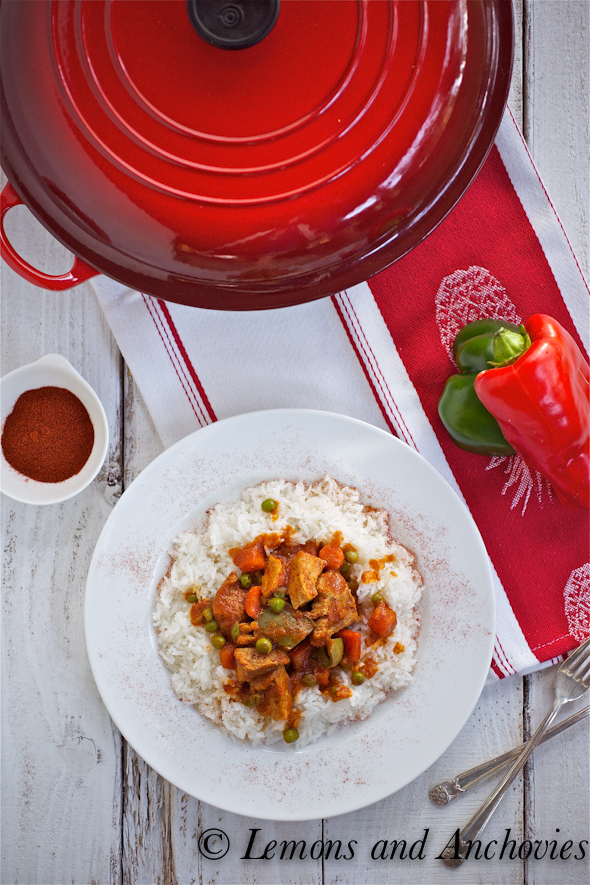
Spicy Pork Stew
I will spare you the twaddle tonight. It is quite late in the evening, my eyelids are getting heavy and all I want is my bed. Sleep has been elusive these last few days but I may finally have a chance at a good night’s rest tonight. It has been a busy last couple of weeks and I will need the energy for tomorrow will be a long day. Fingers crossed.
I won’t leave you hungry, though. I made this simple pork stew a few days ago to answer a craving for a tomato-based dish that I could eat with rice. My inspiration was the Philippine version of menudo–everyday fare that is nothing more than pork, soy sauce, tomato sauce, peas and carrots. Of course, I couldn’t leave well enough alone so even though this was my first attempt at menudo, I had to add a few other ingredients to make me happy.
That night, paprika and cayenne pepper sounded like good additions to me–not only to give the stew more depth but also a bit of a kick. In the end, this pork stew turned out a cross between Filipino menudo and Hungarian stew and I was very happy with it. And the best part? The stove did all the work.
Spicy Pork Stew
- 2 1/2 pounds boneless pork, cubed
- 1 onion, chopped
- 2 teaspoons paprika (you can use regular or Hot Hungarian paprika)
- 1/2 teaspoon cayenne pepper
- 1 tablespoon soy sauce
- 1 8-oz can tomato sauce
- 1 dried bay leaf
- 2 carrots, diced
- 1/2 – 1 cup frozen peas
- 1 bell pepper, cut in bite-size pieces (I used half red and half green)
- 2 – 3 tablespoons olive oil
- salt, to taste
- In a large pot, sauté the onions in olive oil over medium high heat. After about two minutes, add the pork pieces and cook until the meat is slightly brown on the outside, about 3 minutes.
- Add the paprika and cayenne pepper and cook for another minute or two.
- Add the soy sauce, tomato sauce and bay leaf then cover and simmer.
- After 15 minutes, add the carrots and simmer for another 3o minutes. At this point, taste the stew for seasonings. You can add a pinch or two of salt or another dash of soy sauce if you feel it needs it.
- After another 15 minutes add the bell peppers, cover and simmer again.
- After another 5 – 10 minutes add the frozen peas. They will need only 5 minutes to defrost and heat up in the stew. (Total cooking time is about one hour)
- Serve the stew with rice or potatoes.
Tapas: Peri Peri Pepper-Almond Dip with Marinated Anchovies
In the kitchen, I have lately found myself stuck in a box, a Jean in the Box, if you will. The lid is tightly closed and I wait for someone to turn the crank so I can spring out and be freed from my limited views on dinner. I have been serving conventional dinner items–soup, salad, rice, fish, chicken, pasta–one or two of them served at a time, the combinations varying from one meal to the next. Why I feel the need to prepare a complete meal when my husband makes no demands on what I serve puzzles me. Dinner does not have to be complicated–there are no rules (except those that I seem to have imposed on myself).
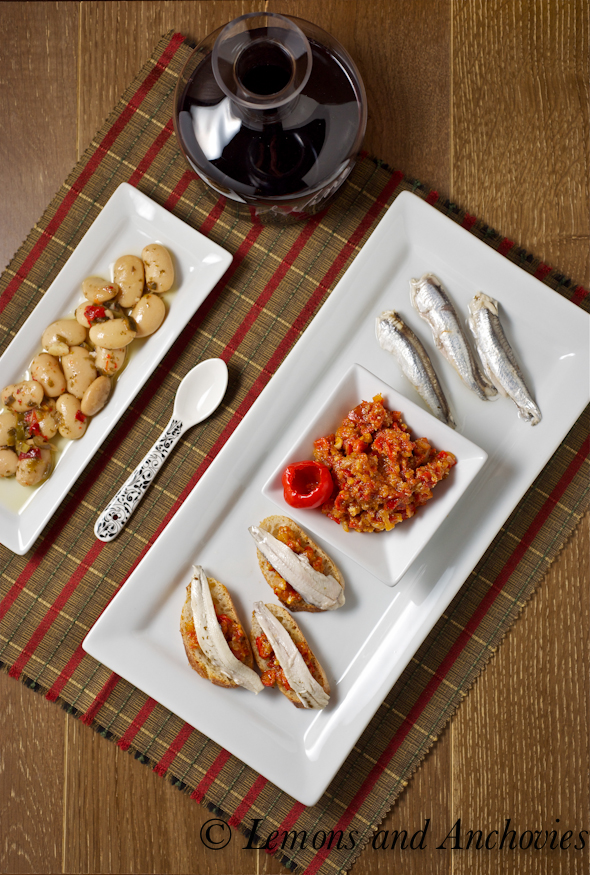
In the spirit of breaking free of this self-imposed bondage, I yielded to a craving for tapas (“little dishes”) and had them for dinner. To have a meal made up of small plates is common in Spain, so I did the same earlier this week.
I was so happy to find marinated white anchovies (boquerones in Spanish) at the market recently that I snatched up a package (20-30 fillets) without a second thought. I knew that some would be served with Caesar salad but that would still leave quite a bit for one or two more dishes. In case you haven’t ever had this variety, white anchovies are not salty like their tinned cousins. The former are marinated in vinegar so they are tart and liven up everything they are served with. I challenged myself to create an accompaniment complementing the qualities of the anchovies.
Ultimately, I decided to make a simple dip out of a jar of peri peri peppers. Pickled in a bit of spice, the peppers are slightly sweet, slightly spicy and just a little tart. I scoured the web for a red pepper dip and found this one which immediately caught my eye for its addition of almonds. I went heavier on the almonds to better balance out the flavors but whether or not it was a good idea to pair the dip with marinated anchovies remained to be seen.
I will be the first to admit that this is an unusual combination but I quite liked it. It is undoubtedly different, using the pickled peppers for the dip–already bold on their own–but this worked for me. Upping the quantity of ground almonds made the dip creamier, holding its own against the marinated anchovies. Served with marinated white beans and wine, I was very happy to have my very own tapas night.
* I know that some of you may cringe at this dish if you detest anchovies but I think you might like the dip by itself. It would work as a dip for vegetables or even marinated mushrooms.
Peri Peri Pepper-Almond Dip with Marinated Anchovies
- 2 cloves garlic, finely chopped
- 2 shallots, finely diced
- 1 cup jarred peri-peri peppers, chopped (I used this)
- 1 tablespoon sherry vinegar (maybe more if you use more almonds)
- 1/3 – 1/2 cup almonds (1/3 cup should be enough, try this amount first)
- 4 tablespoons olive oil (you may need more if you use 1/2 cup almonds like I did)
- marinated white mushrooms (optional)
- baguette slices
- Cook the garlic, shallots, peppers, 1 tablespoon vinegar and 1 tablespoon olive oil on the stove over medium-low heat. The goal is to let the shallot and garlic soften so stir occasionally to prevent burning. Remove from the stove and let cool a bit.
- Grind the almonds in a food processor. I found that for this small amount, my mini processor worked better to achieve finer pieces. After pulsing once or twice, add the remaining three tablespoons olive oil and process until the almonds are creamy.
- Stir together the almonds and cooked pepper mixture in a serving bowl. If the dip is too thick for you, add a bit more olive oil. I added one or two more tablespoons of oil and one more tablespoon of vinegar to get a slightly thinner consistency.
- Serve with baguette slices and marinated anchovies or with vegetables.
Coconut-Almond Torte
When work makes no demands on my time, Thursdays end up being my free days. Not free in the sense that I have no responsibilities. Rather, they are spent on chores that have accumulated during the week, exercise that has been neglected and of course, cooking. But my time is my own and I am free to prioritize in the way that I wish.
I find that on most of these Thursday mornings I linger just a bit longer over my cup of tea. I draft my grocery list around a more elaborate meal to make up for the much simpler Monday – Wednesday fare. Overall, Thursdays are good days.
The last couple, however, have been more frenetic than relaxing. Work has been a bit busier, I am spending my free time studying for a couple of things and we are preparing for another trip. The destination is new to me; I am very excited to visit a new place and also to experience it with my husband and good friends. I hope to be able to share a bit of it here as the trip happens but I won’t put that extra pressure on myself. I will just make sure to take lots of pictures to post when I return.
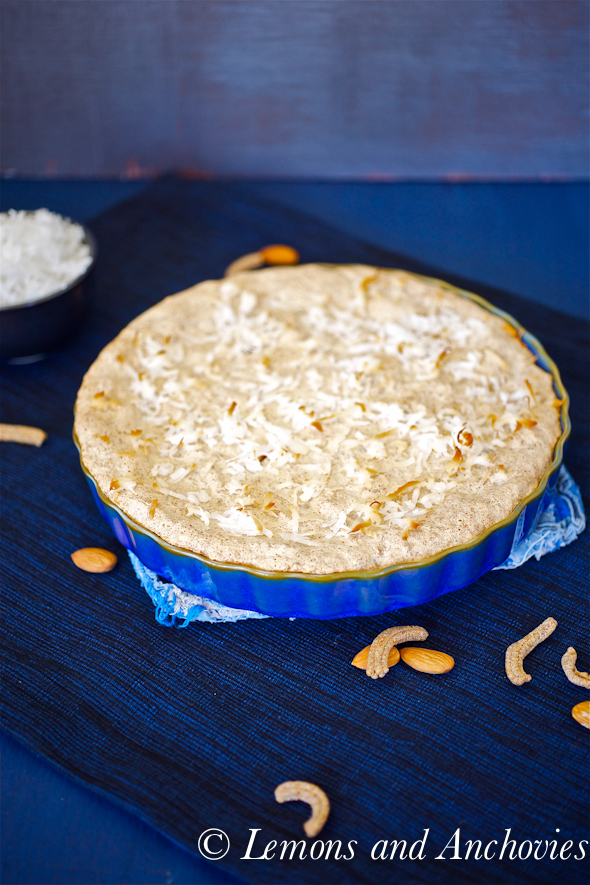
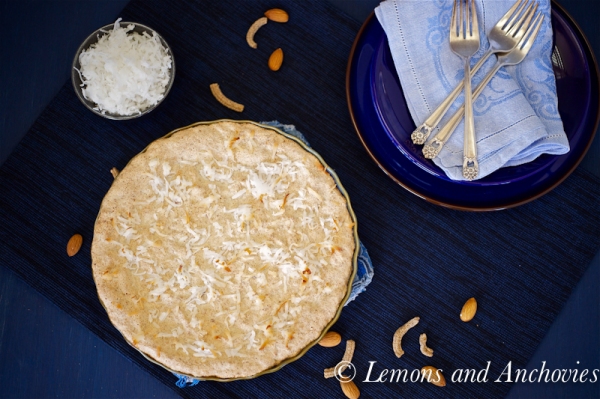
Shoving aside the errands, chores and studying for just a little while last Thursday, I made this simple torte to satisfy an overwhelming craving for, of all things, coconut. I had purchased a bag of sweetened shredded coconut earlier that week with no ideas for an end product. I let the bag sit on the counter for a few days hoping to be inspired. With the help of this recipe, I ended up with this coconut-almond torte. I made substantial changes to the ingredient list to accommodate what was available in my pantry and had to question myself several times if my substitutions would work at all.
The recipe called for graham cracker crumbs but I had none. Instead, I used almond meal and ground up multi-grain cereal to replicate the graham cracker texture. I had no pecans so I used almonds. Instead of vanilla and rum extracts, I used lemon and almond. Instead of a pie pan I used my quiche pan (just because) and I topped my torte with extra coconut.
While this torte baked I wondered if it would end up a casualty of my experiments. While I am more adventurous with savory recipes, I am never confident about making changes to sweet ones. As I pulled this out of the oven, there were no strong indications of failure but there was no big pull towards success either. The surface was a firm shell from the egg whites–to be expected–but it wasn’t until after it had cooled and I sliced into it that I finally smiled. The torte was just right inside–chewy in texture with added crunch from the chopped almonds. The almond meal and cereal lent a slight graininess that I liked but this torte was far from dry. The coconut and almond flavors are the most prominent but the lemon essence is unmistakable. This cake was even better on the second and third day.
That Thursday was a good Thursday.
Coconut-Almond Torte
- 4 egg whites
- 1 cup sugar (you might be able to get away with 3/4 cup)
- 1/2 cup multi-grain cereal, ground up (I used the high fiber, multigrain fruit medley from Trader Joe’s but fished out the fruit)
- 1/2 cup almond meal
- 1/2 cup shredded, sweetened coconut (plus more for sprinkling on top)
- 1/2 chopped almonds
- 1/4 teaspoon salt
- 1 teaspoon lemon extract
- 1 teaspoon almond extract
- Preheat your oven to 350 degrees F.
- In a large bowl, beat the egg whites with a hand mixer until stiff peaks form, about 4 minutes at medium speed.
- Fold in the sugar and beat until glossy, about 2 minutes.
- Combine the almond meal, ground up cereal, coconut, nuts and salt in a separate bowl. Fold into the egg white mixture in the larger bowl then add the extracts.
- Transfer the mixture into a greased 9-inch pie pan (or 8 1/2-inch quiche pan; I lined mine with parchment paper and greased it) and bake for about 30 minutes. I added the extra coconut on top during the last 5 minutes of baking to allow it to brown a little.
- Cool in the pan on a wire rack before serving.
- Will keep in the refrigerator for several days.
Ligurian Lemon Cake with Meringue Topping
The overall success of this simple cake is but a tiny consolation for one low point the previous night. It was shaping up to be a fun evening. We were guests in our friends’ home, enjoying wine with appetizers and anticipating a delicious meal based on the aromas coming from the kitchen. The evening’s prospects improved still at the news that another friend would be bringing along two new friends.
This is Daphne. She is one of two puppies that our friend brought to dinner last night. She, along with her sister, Daisy, will be our friend’s foster pets for the next two weeks. He will be responsible for their care and for helping to socialize them with other people to prepare them for eventual adoption. Judging by their size, Daphne and Daisy are no more than a few weeks old. When the puppies first arrived, they were understandably nervous, uncertain of their new surroundings. Gently scooping Daphne up, I held her and hoped to calm her fears. Within minutes of being in my arms (and the warmth of my sweater) she calmed down and fell asleep. I held her this way while I caught up with my friends and until it was time for her and her sister to settle in a quiet place so their rest would be complete.
During the evening one of our other friends remarked that he had never seen me happier. A bit of an exaggeration, yes, but his point was clear. I looked very happy with my new furry pal. Growing up, dogs were my constant companions but it has been many years since I last considered one a member of my family. Our frequent trips make it impractical to consider owning one and it is almost unfair to any pet to have to endure frequent stays at a doggie hotel. Even our attention-hungry cat, Pilot, seems to notice our absence so we make sure that he is never alone when we’re away.
As we said our goodbyes last night, a couple of friends teasingly said that someone had better check my bag just in case I decided to snag Daphne. Was it so obvious that I was sorry to leave her? Maybe if I didn’t have my friend’s position as a foster pet owner with the SPCA to consider…or if I could be sure that Pilot would welcome Daphne wholeheartedly, I just might have.
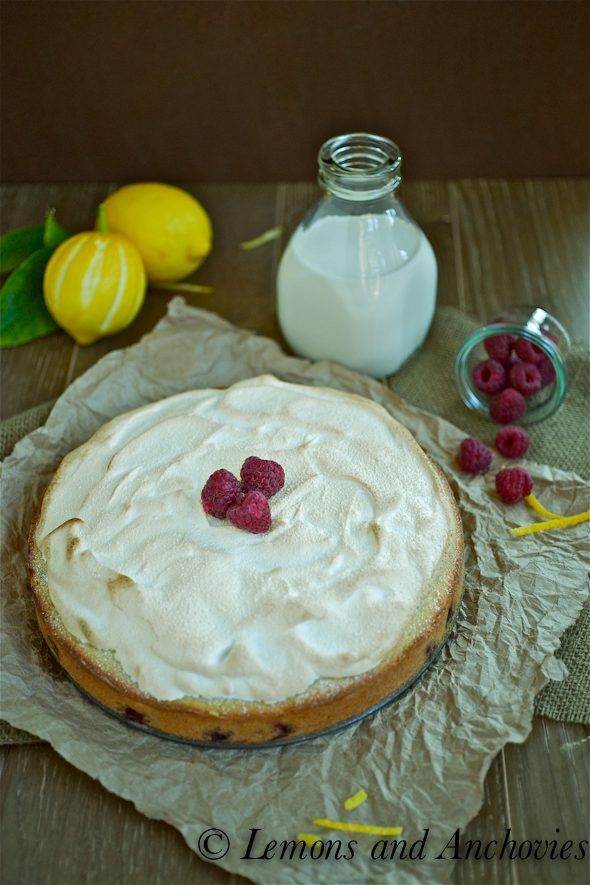
This is another Pierre Hermé creation–a simple cake with a lemon and olive oil base. More than a pint of fresh raspberries are baked inside the cake while the top is gussied up with crisp meringue. The first bite is almost a shock to the taste buds from the tartness of the raspberries but that is quickly followed by the essence of the citrus. Eventually, the creaminess of the cake catches your attention thanks to the olive oil. I had considered omitting the meringue topping since it was offered as an optional addition, but I’m so glad I didn’t. In my opinion, it is the meringue’s mild sweetness that perfectly rounds out the cake’s flavors.
I will be making this cake again very soon…it might just help to lift my spirits after the trauma of Daphne’s introduction into and abrupt departure from my life. You can just make it because it really is that good. Just don’t leave out the meringue.
Pierre Hermé’s Ligurian Lemon Cake
* It is called Ligurian lemon cake because Mr. Hermé prefers the region’s mild olive oil for this cake.
- 1 3/4 cups all-purpose flour, plus more for pan
- 1 1/2 teaspoons double-acting baking powder
- 1 cup sugar
- Zest of 2 lemons, very finely chopped (I mistakenly used my Microplane grater but I think that only enhanced the lemon flavor)
- 4 large eggs, room temperature
- 3 tablespoons milk, room temperature
- 1 tablespoon freshly squeezed lemon juice
- 7 tablespoons (3 1/2 ounces) unsalted butter, melted and still warm
- 2/3 cup mild extra-virgin olive oil
- 1 pint fresh raspberries (I used about 1 1/2 pints)
- To make the lemon cake: Preheat oven to 350 degrees with rack in center. Butter a 10-inch round cake or springform pan, dust with flour, and tap out any excess. (I had to use a 9-inch springform pan so I just baked a bit longer)
- Sift the flour and baking powder in a bowl and set aside.
- Place sugar and lemon zest in the bowl of an electric mixer; rub the ingredients together between your fingers until the sugar is moist, grainy, and has absorbed as much of the zest as possible. Return bowl to mixer.
- Using the whisk attachment, beat in eggs on medium high until the mixture is pale and thick, about 3 minutes.
- With the mixer on lowest speed, beat in milk. Add the flour mixture and beat until incorporated. Add the lemon juice, melted butter, and olive oil; beat until blended.
- Pour about one third of the batter into the prepared pan; there should be just enough batter to form a thin, even layer. Arrange the raspberries on top of the batter. Pour the remaining batter over the raspberries and use a rubber spatula to spread batter over the berries.
- Bake cake until it’s golden and pulling away from the sides of the pan, and a cake tester inserted into the center comes out clean, 30 to 33 minutes.
- Remove the cake from the oven, and immediately unmold it onto a wire rack. Invert cake so it is right side up, and allow to cool to room temperature. Once cooled, prepare the meringue.
For the Meringue
- 1 large egg white
- 1/4 cup granulated sugar
- Confectioners’ sugar, for dusting
- Preheat oven to 475 degrees with rack in the center. Place the cooled cake on a parchment-lined baking sheet, and set aside.
- In the clean, dry bowl of an electric mixer fitted with the whisk attachment, beat egg white until it holds soft peaks. Add granulated sugar in a slow, steady stream and continue beating until firm, glossy peaks form.
- Using a metal icing spatula or a spoon, immediately spread the meringue over the top of the reserved cake. Dust the meringue with confectioners’ sugar.
- Bake the cake until lightly browned, 4 to 6 minutes.
- Serve.


